- Version Control and You(nity)
A voice from the past, joining yours and mine.
Adding up the layers of harmony.
And so it goes, on and on.
- Emiko Shiratori, Melodies of Life
Getting started with version control… with probably a bit too much of the theory.
A friend expressed her concern about making changes to her VRChat avatar and not having a backup - which has reminded us of just how important version control is to us.
We’ve used it in some capacity for at least the past 10 years at this point - starting with little uses at work; making sure we could always go back to a working version of a script we were tweaking - without having to resort to the dreaded scourge of manual copies with version 3.1 - final - DEFINITELY FINAL appended to the end. Management at that role didn’t see the need for a centralized script store (which in retrospect may have been short sighted), but it was always useful to us for being able to go back to what we’d made before.
And when we started working on VRChat avatars, that habit continued. We’ve made effects at 4am for Furality which we then overwrote - then after the event realized we liked the look and were able to pull it back out from that history.
Preamble
Disclaimer
We are not experts. We are simply following the principle of “share what you know”.
This post is primarily about simple workflows and first principles; designed for someone working on their VRChat avatar rather than a team collaborating in Unity.
What is version control?
Version control software (or source control software) is software that allows for restoring the state of a directory (or repository) at a specific checkpoint (or commit) in time.
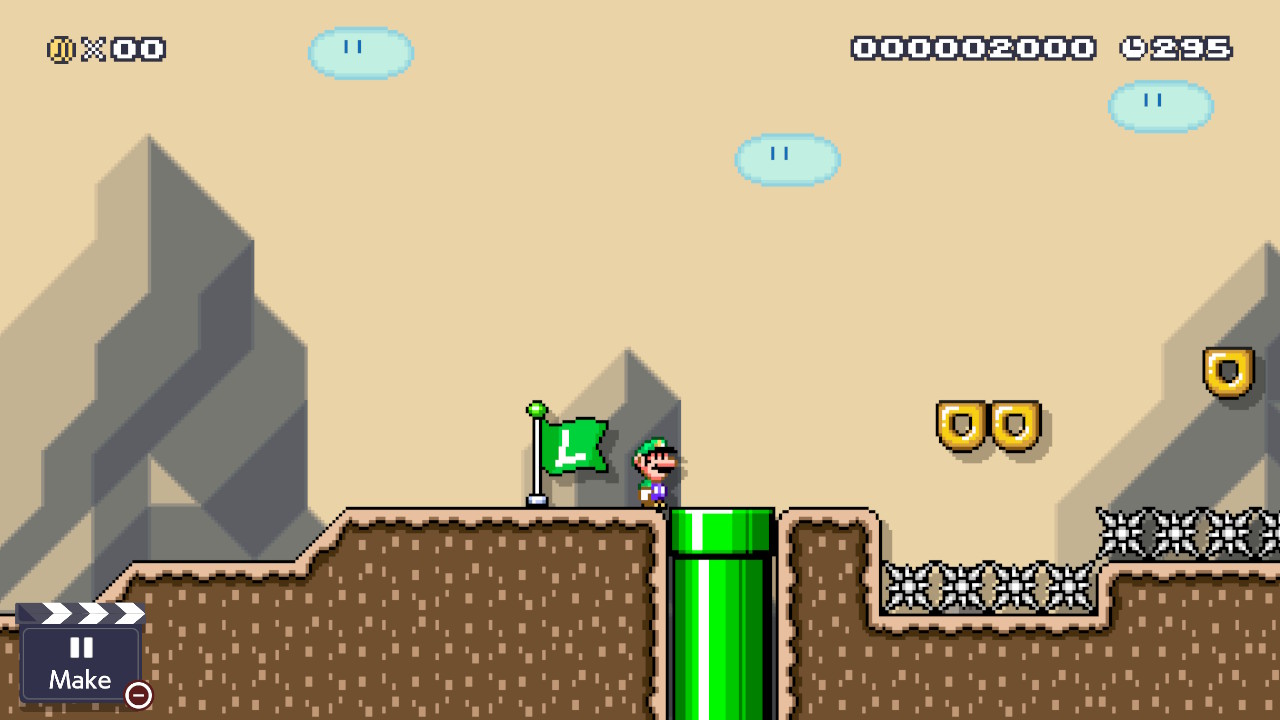
If it helps, imagine that at any point in the future - even after clearing the level - Luigi can come back to this checkpoint (or any other checkpoint he’s ever touched) and explore what’s down the pipe - regardless of what happens with the spikes up ahead.
(Or imagine the finale of Everything Everywhere All At Once. That works too).
Of the different pieces of version control software available, git is the most commonly encountered now. Originally created for developers to collaborate on the Linux kernel, it has become basically the same thing as version control for most people.
git is distributed version control software. That means if you have multiple people/creatures collaborating on a project (or one person/creature with multiple computers), each of them has their own copy of an entire repository. This uses more storage, but should something bad happen (laptop thrown in river, left on train, hit by meteor, etc.), it’s still possible to get a new copy of the repository from a collaborator and/or other computer.
In what is probably the most famous example, distributing source code like this was responsible for saving (a version of) Toy Story 2. (Of course, this example pre-dates git’s existence)
git can also be incredibly complicated. There are reasons why entire books have been written about the subject. It is possible to set something up with so many branches, timelines folding back and forth in on themselves, that it makes Homestuck seem simple when you see everything mapped out.
But all we’re looking for is the basics. One person/critter (…or a collection of them that to the outside world looks like one).
A linear timeline.
It might still take a while to explain the theory, but once you understand the concepts, the most common actions aren’t that complicated.
What version control is not
Version control, by itself, is not backup. You can create a git repository anywhere you like, and you can go back to anything in that repository - but if that repository only exists on your machine, then you still have no options if something happens to that machine.
Our git projects tend to exist on at least two computers, with our NAS used as a central point to sync to. One of the locations on those computers is to OneDrive, so there’s a copy there - and the NAS is backed up to the cloud via Backblaze. This may or may not be overkill, but it means that we should be able to get things back even in the event of a house fire.
As a reminder, cloud storage providers by themselves also aren’t backup - if they don’t provide their own version history, a ransomware attack could still absolutely wreck both your local copies of files and the cloud copies before you notice.
Version control is not GitHub. GitHub is one place where you might choose to host your repository. It provides a lot of tools, especially with collaborating with others - and it might be a good choice if you want to make a public repository to release an avatar into the public domain, as one example.
But it is also a centralizing service that isn’t needed if you’re not doing something that requires it. It places limitations on what you can do that aren’t there if you’re just having things go on your network - particularly with the fact that in Unity, we’ll be dealing with large files that aren’t text (aka binary files) - which do not compress well (more on those later). Storage in particular is one thing that might push into a paid tier. Additionally, there are restrictions placed on private repos, which most avatars would need to be to avoid violating the avatar creator’s terms of service. And of course, anything uploaded there is now subject to Microsoft scraping it for Copilot.
There is one ironic thing here, that at some point we’d like to open source our websites - both this site and my site. And for that… yeah, we’d probably use GitHub because we don’t want to deal with setting up the infrastructure that would be needed for publicly hosting our repos.
But also particularly in the repo for ❤️’s site, open sourcing them as they are would probably reveal some things about our local setup that shouldn’t be there, and we’re not sure how to best extract those or if the solution is just starting with fresh history from a known good state!
As we said above, not experts.
Git is not the best at dealing with large binary files due to the way it compresses data, which might be a problem if you have large 4K textures or the like.
There is an extension to fix this called git LFS (Large File System) - but unfortunately it’s incompatible with the git server we run on our NAS, so we can’t be of too much help with it. There is a tutorial here for using it with Unity using GitHub as the basis, with links to some other tutorials.
For our purposes, git will still work without git LFS - it might just take more storage space if you’re making frequent changes to textures.
OK, that’s enough preamble
What you’ll need
- Git itself. If you’re running Linux, this may be installed out of the box, otherwise you can get it from the official site.
- If you’re not comfortable working in the terminal all the time, you’ll want an editor that has git functionality. Visual Studio Code isn’t our preferred editor now, but it is free, cross platform, and Good Enough. (…also we know where the source control options are.)
For this tutorial, we’ll assume you already have VRChat’s preferred version of Unity installed and an existing avatar project. (Or you’ve just bought a new avatar from somewhere and are looking to set it up).
Configuration
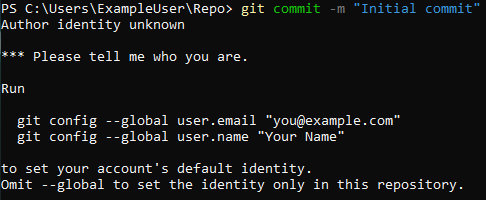
Before you can start working in a repository, git strongly suggests setting up a user name and email address, which will be recorded against all commits in this repository - but it’s more convenient to do it for all commits on your user account on that system.
These do not have to be your real details, they will not be validated - but if you do share a repository with someone, they will be able to see the details. Keep this in mind if you set this up for your whole user account - be careful that you’ve used the name you want to be known publicly by. If it’s a work repo you might not want your fursona name in there or your email address with multiple 69s - but equally there are cases where people have been deadnamed by companies that have just scraped a bunch of shit off GitHub.
| 💡 | tip If you’re not on Windows, you might be able to get away with not doing this, in which case it will take information from your user account on your local system (e.g. user@hostname.local). This also might not be desired. |
You will need to open a terminal window for this step.
If you’re on Windows, right click the Start button (or hold down the Windows key and press X on the keyboard) to bring up the power user options menu, then look for “Command Prompt”, “Windows PowerShell”, or “Windows Terminal”. You don’t need to run them as admin.
If you’re on Mac or Linux, searching for “Terminal” should find your OS’s terminal application.
Providing git has been installed as per the prerequisites, run the following to set for your user account. Press the enter/return key after each command.
git config --global user.email "youremailaddress@here.example"
git config --global user.name "Example Name"
(Once a repo has been init-ed as per the next section, you can omit the --global to set up for that repository only, if you’re in the right directory)
For plural systems, you can also override the author on a per commit basis, though this is likely to get annoying without creating command aliases. We don’t do this since I tend to front, but also commits are in the legal entity’s name anyway. But if you’re more metrics driven as a system, here’s how you can find out which headmate isn’t pulling their weight!
This is the main thing that needs to be done in the terminal - and as such, further terminal advice will assume a basic level of proficiency (i.e. you can successfully change directories). Use VSCode or another editor if you’re not confident in this.
initiation ceremony
Before git can be used for a project, it needs to be initiated in that project’s directory - this creates the support files git needs to function.
If you have a Unity project ready to go, continue reading below - otherwise if you just have the .unitypackage, you’ll probably want to at least get it into a project state - following the new project setup advice as part of a previous article might help might help.
I do still need to go and update that at some point…
init via vscode
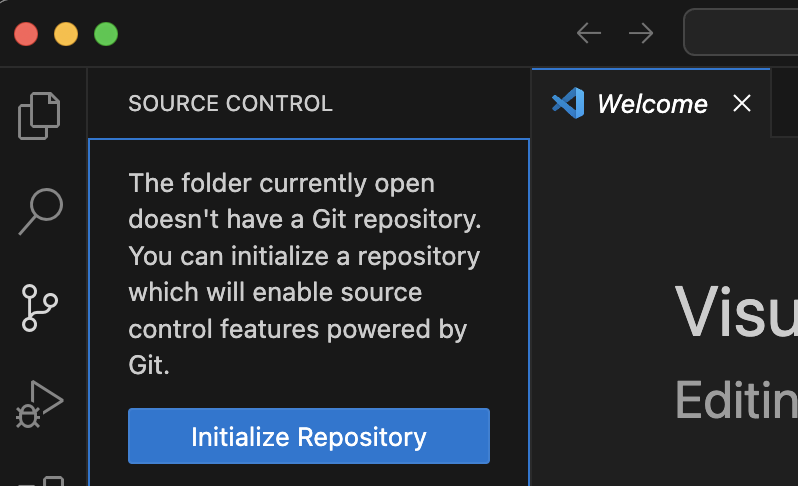
In Visual Studio Code, go to File > Open Folder, and find the folder containing your project.
Click on the Source Control icon in the sidebar to open the Source Control menu, and then click on the Initialize Repository button.
init via terminal
Change directory to your project’s directory, then run:
git init
ignorance is bliss
As part of creating a project, Unity creates and downloads a lot of files in the process of setting up a repository. VRChat’s package manager creates and downloads even more.
However, if these files were to go missing, Unity would regenerate or redownload them as needed. We only need the important files to be tracked - because trying to keep track of all of Unity’s temp files as well would use a lot of additional storage space.
git supports a special file called .gitignore. If a file named .gitignore (or any file name with that as extension) placed in any directory, it will cause git to ignore any files in that folder or subdirectories that match the patterns in there.
Github provide a default .gitignore file for Unity projects.
Create a .gitignore file in the root of your Unity project via your preferred method, and copy and paste the contents from that file into it. Save the file. (You can also download the file from this Github repo and rename it to .gitignore - make sure you’re showing file extensions in the OS if doing this)
If you’re using VSCode, click the refresh (↻) button in the Source Control panel, and you should see the number of changes go from 10,000+ to primarily just the things in the Assets directory. In this case, this is a fresh project, so there’s only 28.


In the terminal, you can see this using:
git status
| 💡 | tip If you’re still seeing the files in other folders, make sure the .gitignore is in the root of your Unity project. |
Before doing anything else, we need to tell git that the .gitignore file is an important file that should be tracked. I like making it the only thing that’s part of the first commit.
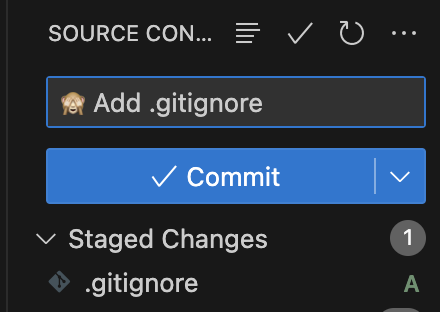
In VSCode, find the .gitignore in the source control window, and click on the + icon next to it to add it to git’s staging area. At this point, the file is being tracked by git, but it is not in a state where we could easily get back to it.
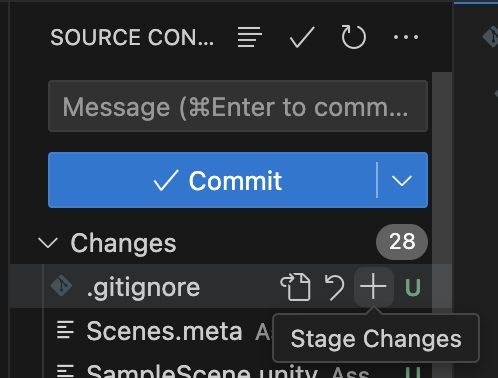
Type a commit message into the “Message” area, and click the Commit button.
To do this at the terminal, instead run:
git add .gitignore
git commit -m "🙈 Add .gitignore"
The -m flag just tells git what message to use. If a message isn’t provided, git will normally open up the system’s default editor to let you write the message… which in most cases is vim on Mac and Linux systems, and without checking, I think Notepad on Windows.
(Quitting vim if this happens is outside the scope of this tutorial).
Commit messages are more art than science - much like the notes you make, think about Future You when you’re writing them and what you might need to know. The usual convention is for the first line to be a short subject line, and subsequent lines to give extra detail if needed.
As for why the See No Evil emoji in this example, see here - you absolutely don’t need to do this, but it can make going back later easier. It’s more helpful for me with things like this site than Unity projects though…
Ch-ch-changes
The good thing is?
That’s the workflow. That was the hard part for most of what you need to do.
You can now add the other files from your project. The fastest way to do this in VSCode is using the Stage All Changes + icon, which shows up when hovering over the number of changes.

In the terminal:
git add .
git commit -m "🎉 Initial commit!"
. is shorthand for “the current directory the terminal is in” - so it’ll add all changed files in the current directory.
From this point forward, you want to try and make each further commit as small as possible - for them to be atomic. For example, if you change the textures on your avatar, and then tweak the material - you might later decide you like the material tweaks but want to revert the texture - and having them as two separate commits makes that easier to find.
In VSCode, you can pick from the file picker in the Source Control tab as was done for the .gitignore.
In the terminal, you can use wildcards to make it easier if changing multiple of the same kind of item:
git add *.png
git commit -m "🍱 Draw a big :) on main texture + emissions"
git add *.mat
git commit -m "⚡ Tone down badly performing effects"
Change, stage, commit.
Change, stage, commit.
Check what’s outstanding using the Source Control view or git status.
Commit early, commit often is a good mantra to have.
…even if it’s one we sometimes struggle with.
If something is being overwritten that you might want back at some point, commit.
If you’re adding a new asset or package, commit.
If you’ve successfully uploaded to VRChat - tested the avatar, and it works - and there’s stuff not committed, commit.
Remember that only what’s committed will be available in future. git does not act as an autosave 1. If you tweak a file without committing, and then tweak it again and then commit, all you have is the current file, and the file before the first set of tweaks.
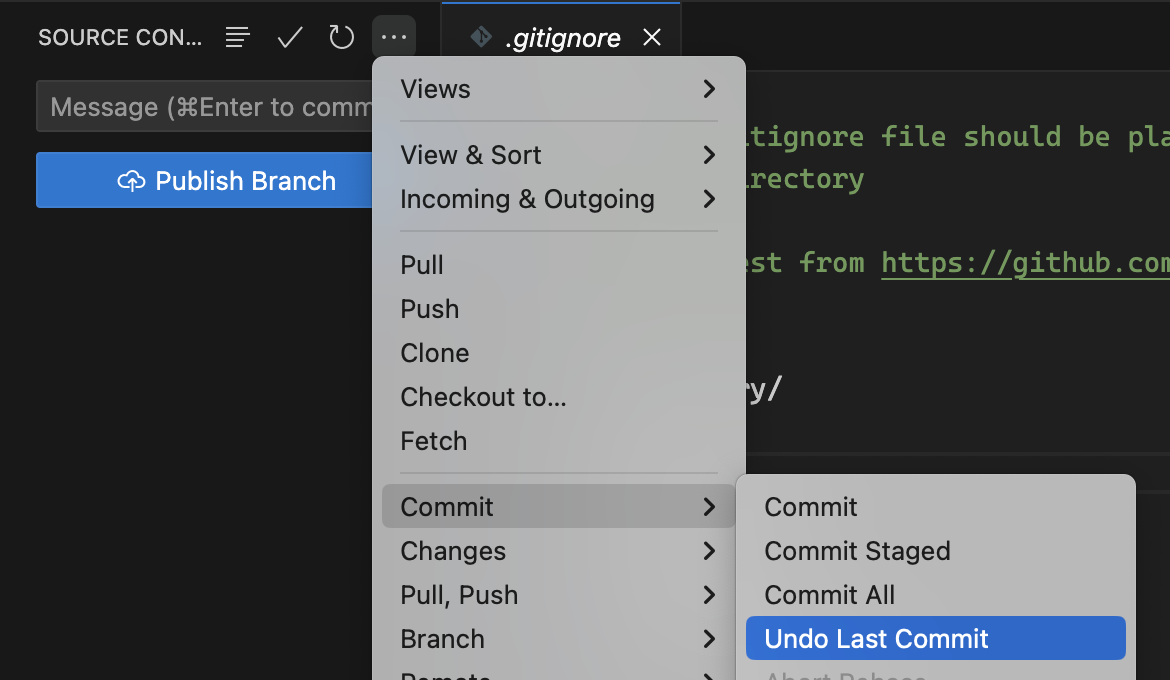
If you make a mistake while making a commit, in the … menu in VSCode, there’s an option to revert the last commit.
In the terminal, you can run
git reset --soft HEAD^
to do the same thing. From there you can unstage files if needed.
(The --soft option keeps both your files and git’s staging area intact. Explaining what HEAD^ is would require explaining things that we’ve been glossing over for the sake of keeping this beginner friendly).
Save and Return to the Dawn of the First Day?
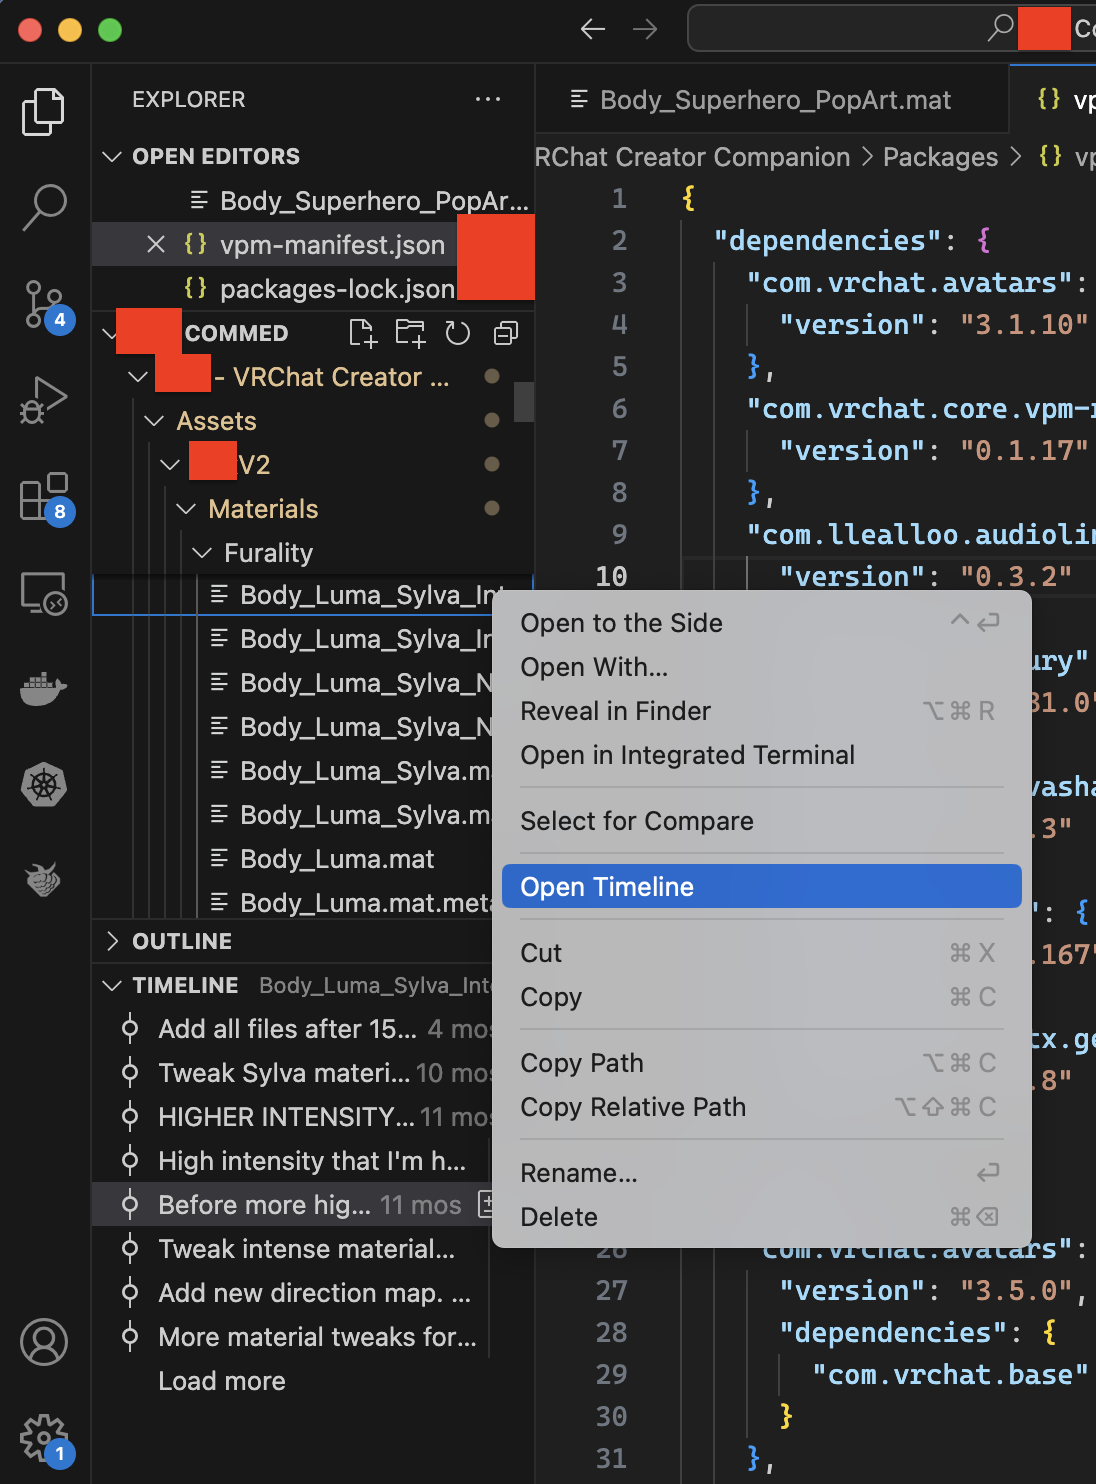
So, now the main question is how we retrieve stuff from all those commits, if needed. I gave the example earlier of a specific version of the material on the Furality version of my avatar, so let’s look for that again.
Depending on the changes made, this is one aspect where VSCode by itself might not be the best tool for the job. By right clicking on a file in the Files tab, we can open it in VSCode’s timeline view - and from there, click into it to make changes to it or copy text from it. However, this requires the file to still exist. It does not work very well with deleted files.
There was an extension we used to use to help with this (and also improving things like copying the old revision of the file), but they’ve moved an increasing number of features behind their paid offering to the extent I don’t know if I could still use it - so the terminal (or alternative IDEs) are our main way of handling this.
Each commit is given a commit ID (or commit hash). git log will show a log of all commits and their hash. It can also be provided with a filename or wildcard pattern to look for a specific file.
In this example’s case, I know the file’s name is Body_Luma_Sylva_Intense.mat. I also happen to find the default display format a little unwieldy, so I’ll override that using --pretty=reference.
git log --pretty=reference *Intense.mat
a8cd565 (Add all files after 15th, just in case, 2024-01-03)
9572c01 (Tweak Sylva materials with AudioLink, 2023-06-13)
114e50f (HIGHER INTENSITY!, 2023-06-04)
dc3c8ef (High intensity that I'm happy with before more tweaks, 2023-06-04)
f89d1ce (Before more high intensity tweaks, 2023-06-04)
...
I know the change was made on June 4th from screenshots at the time, so I can stop reading here.
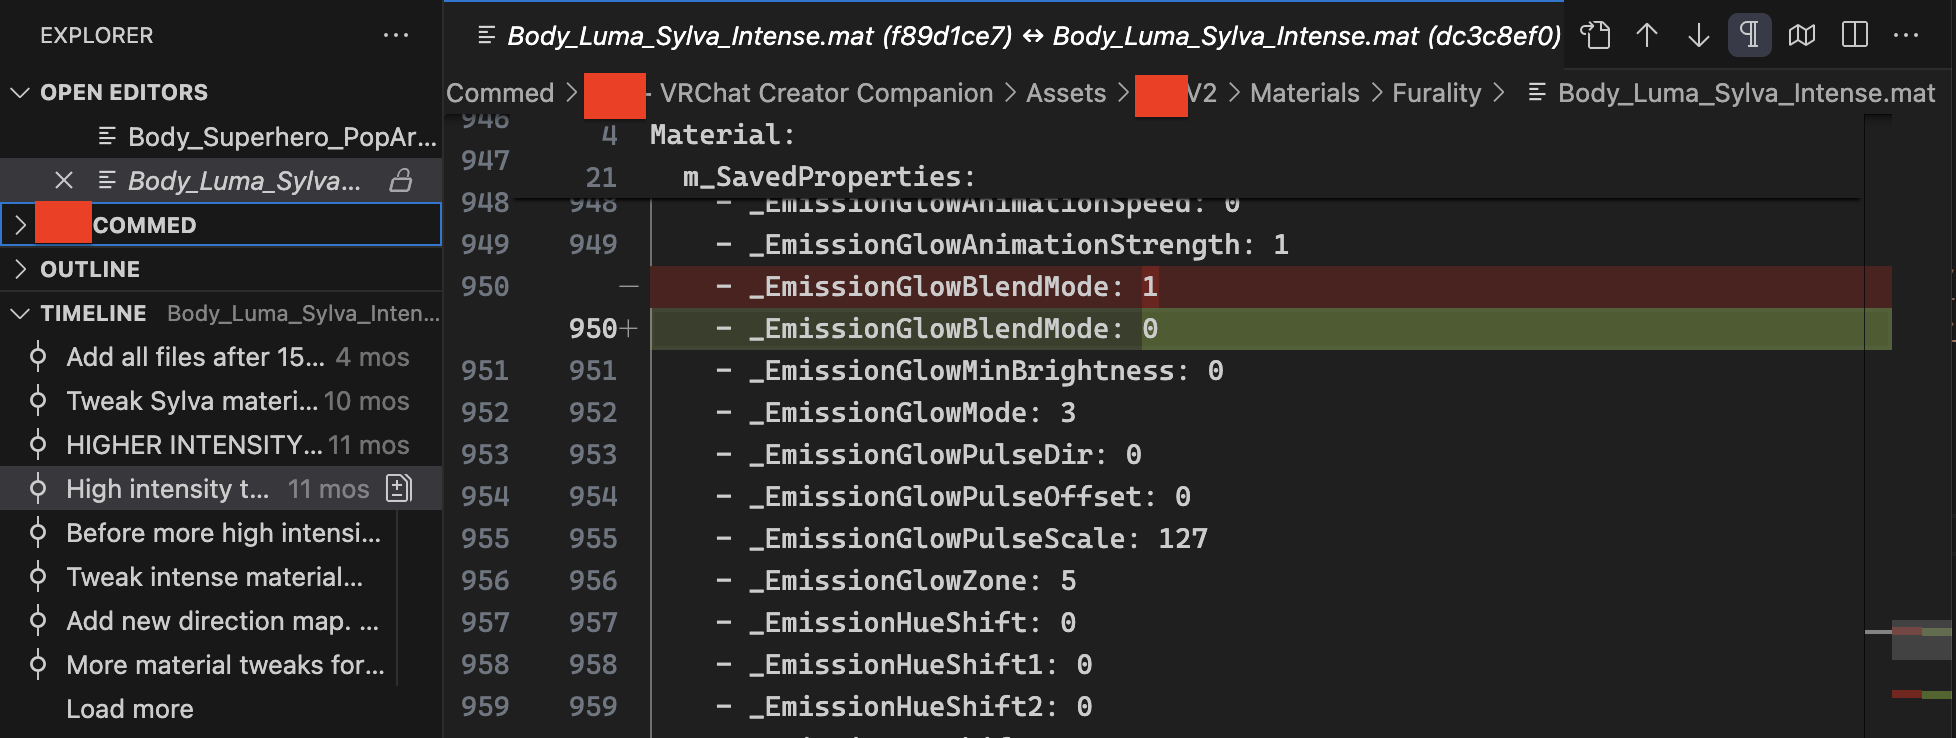
By using git diff commit_id1 commit_id2, we can see what changed between those commits. (git diff by itself will show what’s currently different).
So for example in this case, git diff f89d1 dc3c8 will show the difference in the files. (In the case of binary files, it will only show that there is a difference).
Once we’ve found the right version of the file, we can go back in time.
| ⚠️ | warning Make sure you’ve committed everything else before doing this. Also, try not to change anything while the repository is in this state. |
git checkout commit_id
will bring the repository back to the state it was in at the time of that commit.
From there, we can make a copy of the file in question to somewhere else, and then go back to the future using
git switch -
We can then copy the file back or rename it as needed.
(There are other, probably better ways of doing this, but this is the one I’m used to)
In this case, before and after running git checkout f89d1:
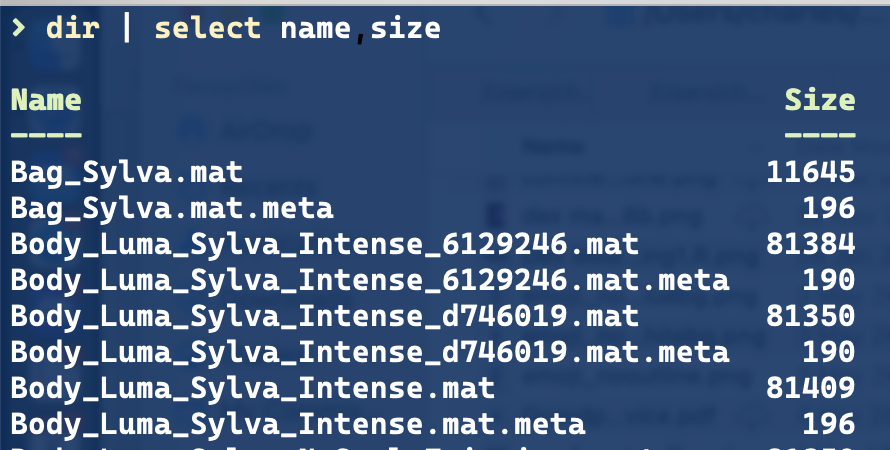


Note that files created after this commit have been deleted, and that the size of all files has been reverted, not just the Body_Luma_Sylva_Intense.mat.
(Also, this operation does not preserve timestamps, so be careful if you were reliant on those)
Then, once I’ve retrieved the file, just run git switch -, and everything is as it was.
And (Basically) Done
You now have a single user, linear timeline git repository, optimized for working with Unity. The absolute basics to recover from mistakes without having to take a full backup of every change made.
There are several ways this can be extended - you might explore a feature branch workflow to make sure you always have a working version (aside from the fact that there are some situations where the VRChat Package Manager might update packages, which can still break things).
You might explore having a git server running somewhere which is pushed to as a remote - this is the setup we have with our NAS, meaning that any machine we use can have files pulled down to it.
Hopefully this hasn’t been too overwhelming; there’s a lot of ground to cover.
footnotes
-
You can create a
cronor Task Scheduler job to do an auto-commit every so often though. This is beyond the scope of this guide, but we do have something similar set up for the repository that contains our Obsidian vault, that auto commits it if it’s been 30 mins since the last commit. ↩