The muscle is Vector, the karma collector / And he's sworn to fight for you
- Gunnar Nelson, Team Chaotix
On vectors and very flashy lights.
This week, we've been customizing a lot of textures on our VRChat ahead of Furality Somna.
And that, combined with some queries, got us thinking about our workflow.
flatland experiments
A lot of friends will paint on the model, primarily with Substance Painter, Adobe's offering. Some will use open source tools like the UcuPaint add-on for Blender - or even just Blender's built in texture painting.
But we're not good enough at Blender to do more than the basics, and we count UcuPaint as more than the basics. (It also feels like it's something that makes more sense with a graphics tablet).
Procreate's paint on model feature is easy to use as soon as you know how to convert models to the required USDZ format, but it feels imprecise; strokes frequently clipping through the model. [1]
And our dislike of Adobe is such that we don't even want to pirate Substance Painter - we do not want to get locked into that workflow, because we've lost track of the amount of friends that have complained that their non-subscription, frozen in amber version [2] can't open the file for a new base.
Some avatars might come with a layered 2D file [3] for easy editing with any art program, with preconfigured masks.
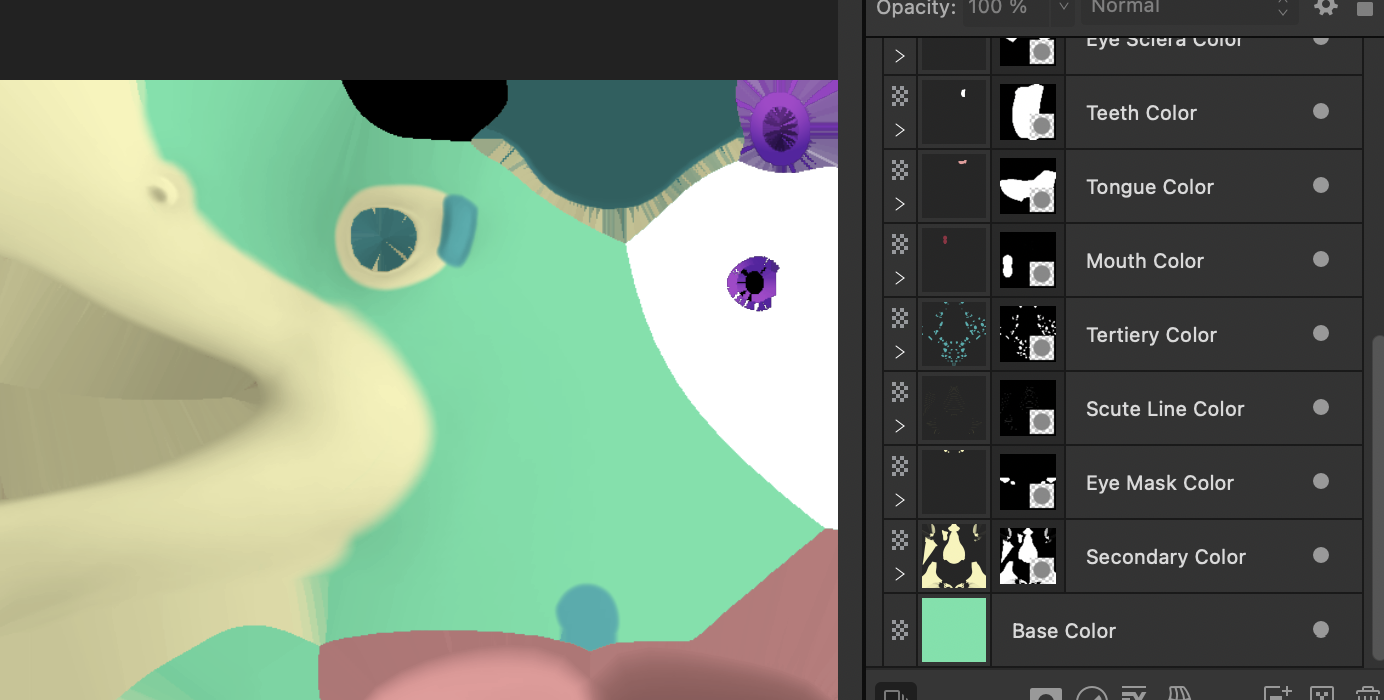
This example is from Eligecos's Cloud Keeper - with just a few clicks of the fill tool, you can have a custom texture with your colours.
If you're an avatar author and do this, thank you for the work you do.
But avatars that are so good about this kind of support are rare. Most bases come with a flat, final set of textures, and a Substance Painter file.
So, when we started modifying avatars, we took the advice of an old friend about what she was doing - at the time, she was importing flat textures into Inkscape to make modifications.
Inkscape is a vector drawing application. That makes it ideal for laying down shapes that can be easily edited and tweaked later. You can use selective recolours and masks to change the colour of a flat texture while maintaining (most of) the shading.
And that's the workflow we still generally use - but with the open source Inkscape swapped out for the still currently subscription free Affinity Designer. Affinity Designer is substantially nicer in terms of UI - but what really sets it apart for us is how easy it is to export multiple different variants of a texture at the same time.
Affinity Designer can even do this in the background when a change is made - providing for a nice workflow of editing in Affinity Designer, then swapping back to Unity and immediately seeing the change without having to hit any sort of export button - especially useful for editing audio based emission masks which are reliant on Unity running in Play Mode.
a worked example
One of the avatars we've bought before and want to use for parts of Furality Somna is the Jerry Avali by Wispweaver, largely because we already own it.
We also already customized the base texture including emission masks after buying it - but we need a dream themed outfit for Somna.
fashion design
Some avatar work, we'll jump into without a solid plan first; feel it out with what we're doing on top of the model. This is usually the case when we already have a really strong mental image of what we want to do.
For the Somna avatars, we've had less of an idea what we wanted to do, so we've ended up doing quick sketches in Procreate.
I want to make it clear at this point that we are not artists. Our brain just gets stuck on symbol drawing a lot. Our skills are enough that we can communicate an idea to an actual artist, or win an occasional round of one of Jackbox's drawing games.
But a shitty, drawn without reference doodle is enough for this purpose.

geometry wars
Ordinarily, we'd have an idea of all of the clothing options available for an avatar before doing the sketch above; with not being able to use Blender to its fullest, a lot of the avatars we use don't have that many outfit options.
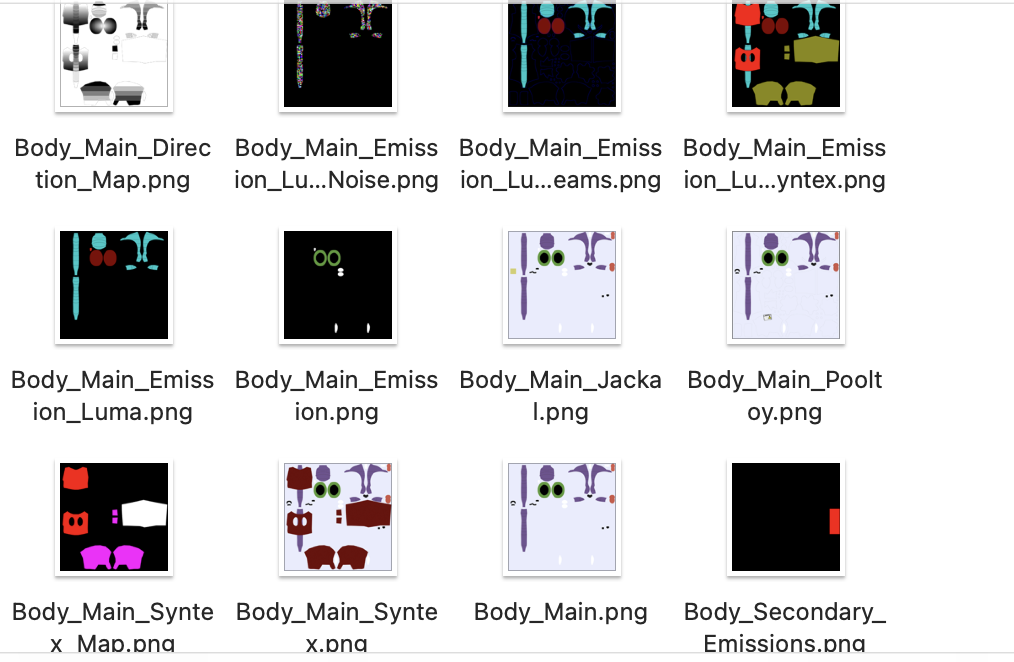
But the Jerry is a popular base, and that means there are third party outfits available. A quick search found this Santa outfit, and it isn't hard to see how the tunic could be converted. (And the arm warmers, while not part of the original sketch, would still be cute).
Blender's Game
We still consider ourselves scared of Blender, in a way. We don't touch 90+% of the things it can do for fear of things breaking; we've had avatars break all animations with simple tweaks because the T-pose was somehow different between what was in Unity and what was in the provided Blender file.
But some knowledge of the basics goes a long, long way in not having to touch the rest of it.
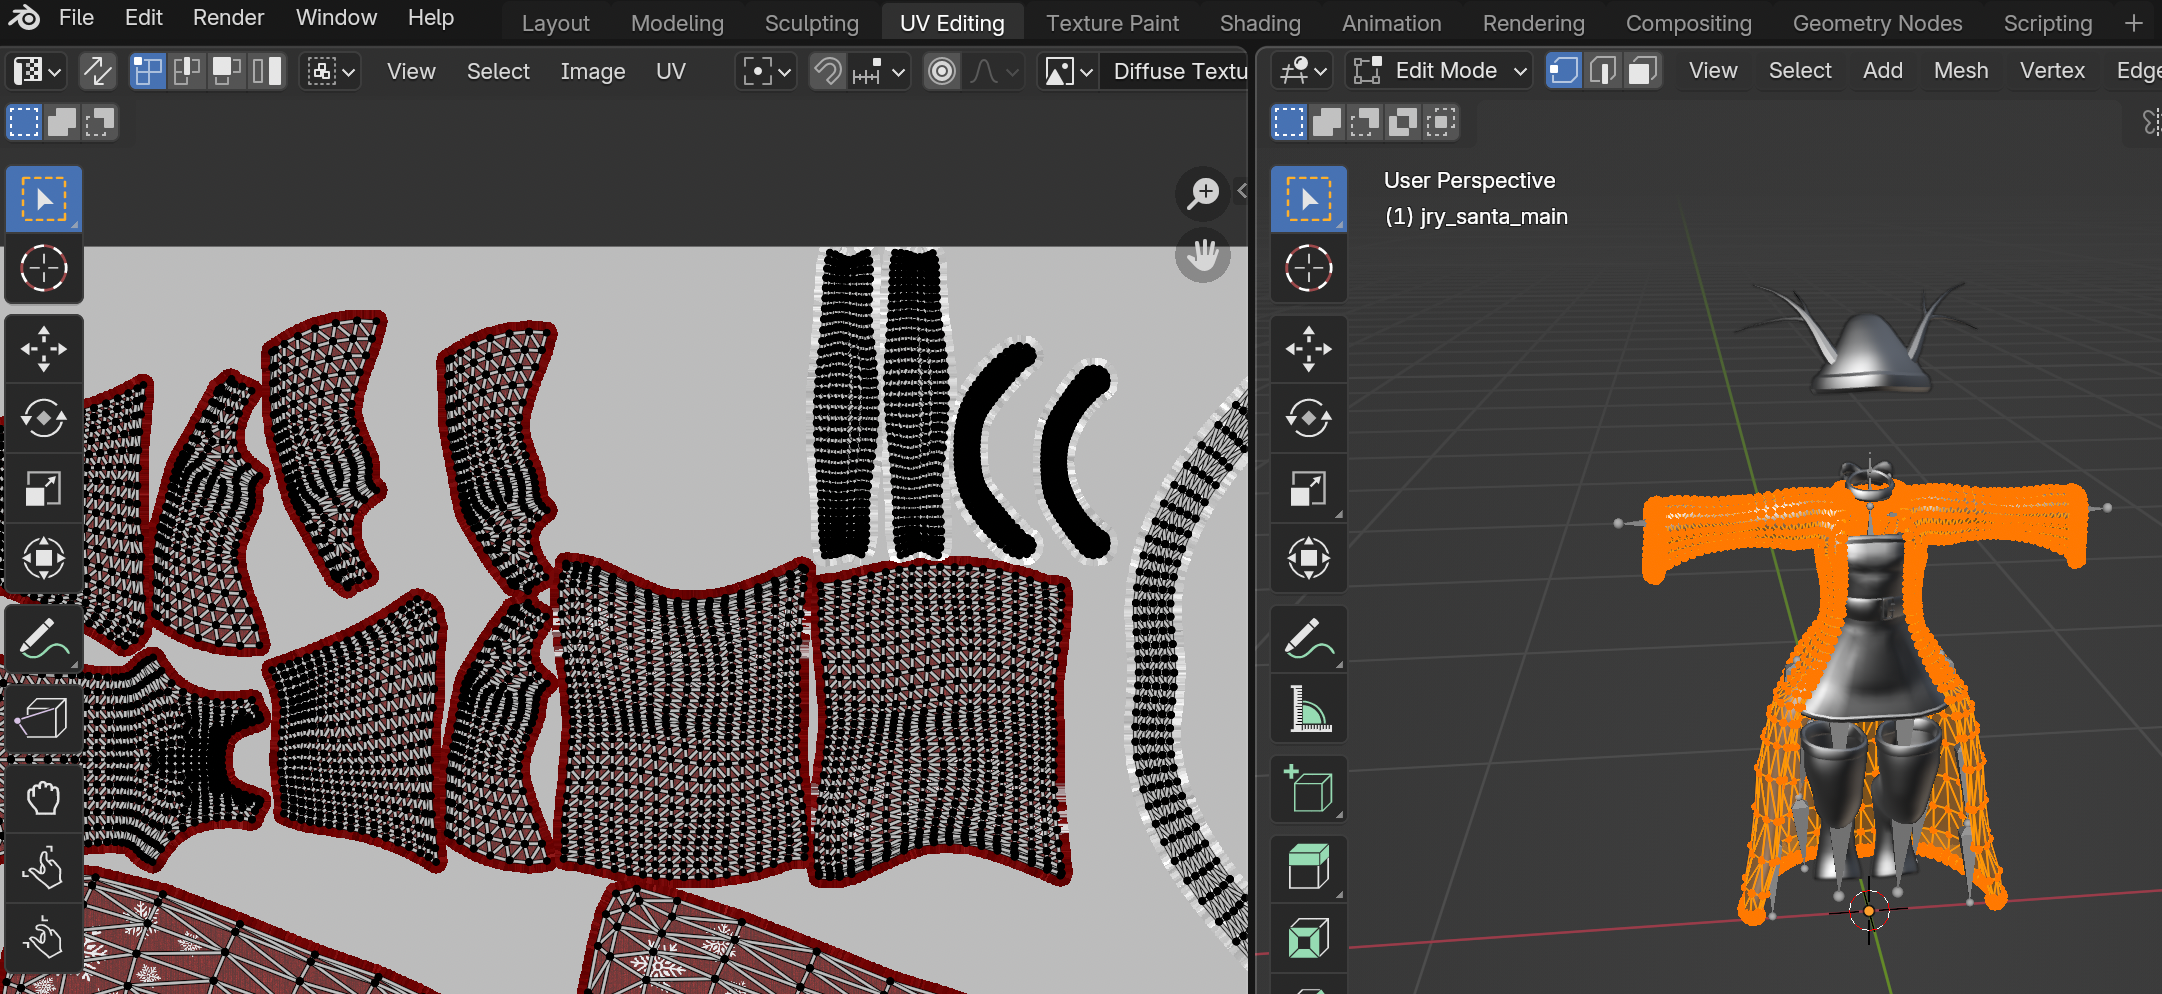
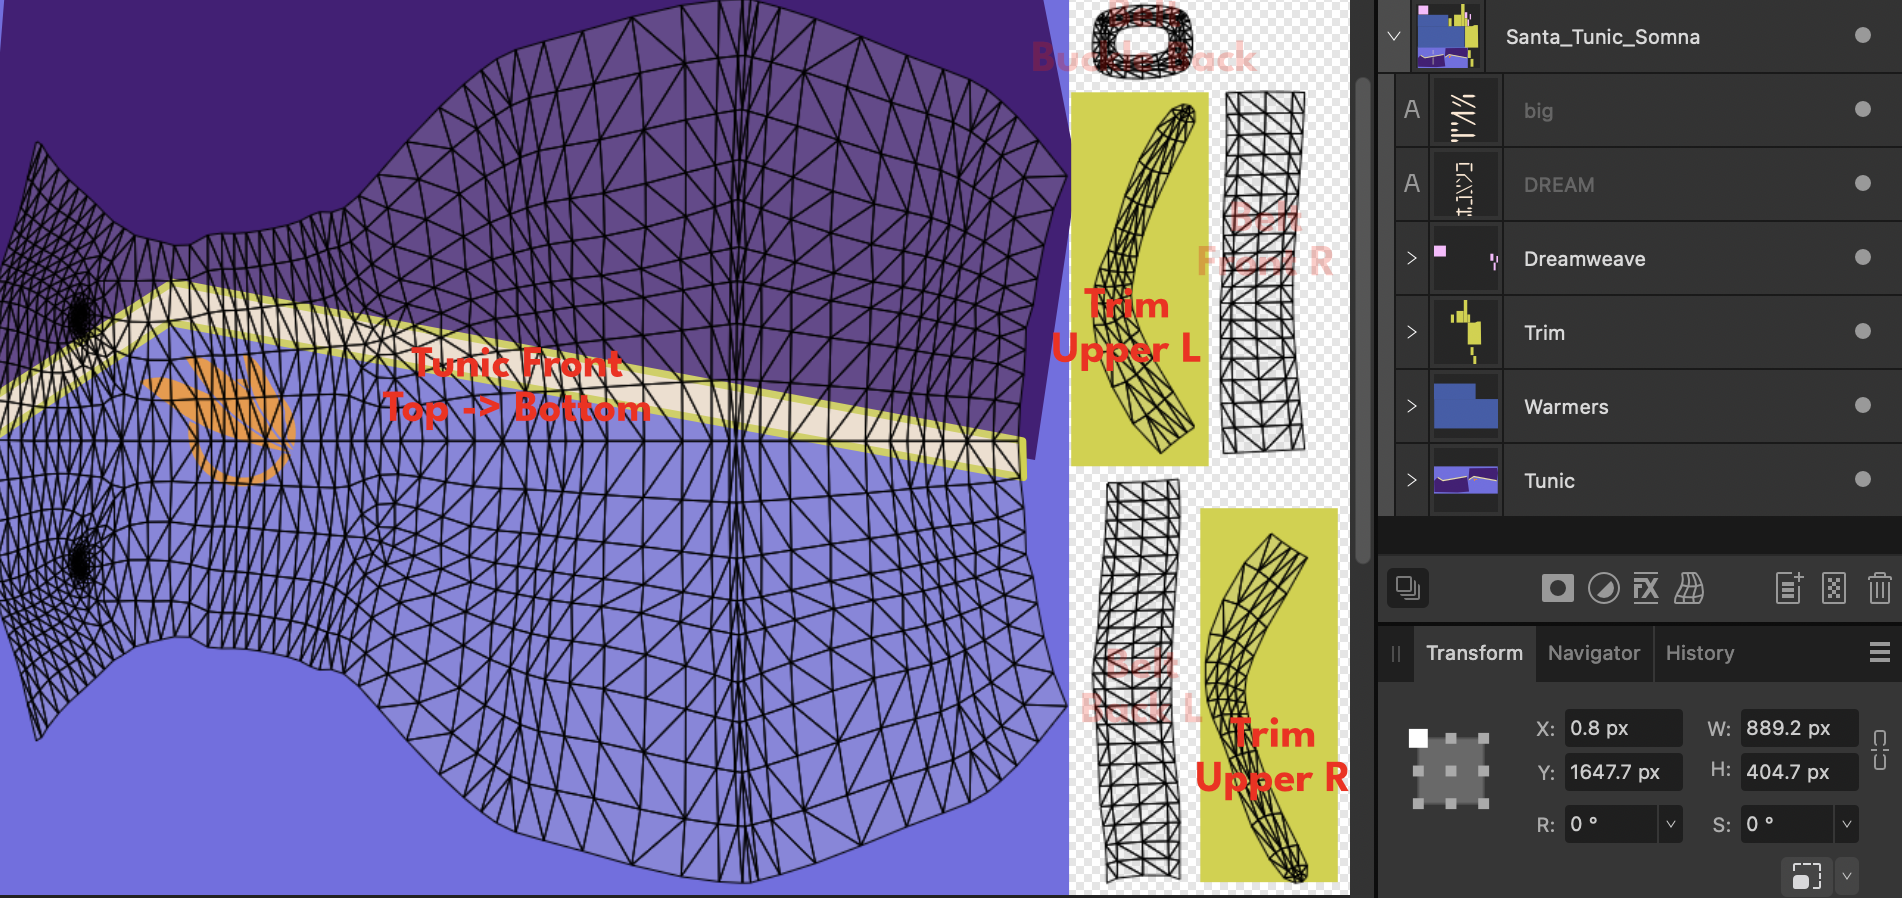
For example, being able to export a UV map from Blender - by importing the FBX, then selecting the part of the mesh in Object Mode to be exported, clicking on the UV Editing tab at the top, then going to UV > Export UV Layout - that makes it a lot easier to know where the boundaries are when working with just the texture.
discovery phase
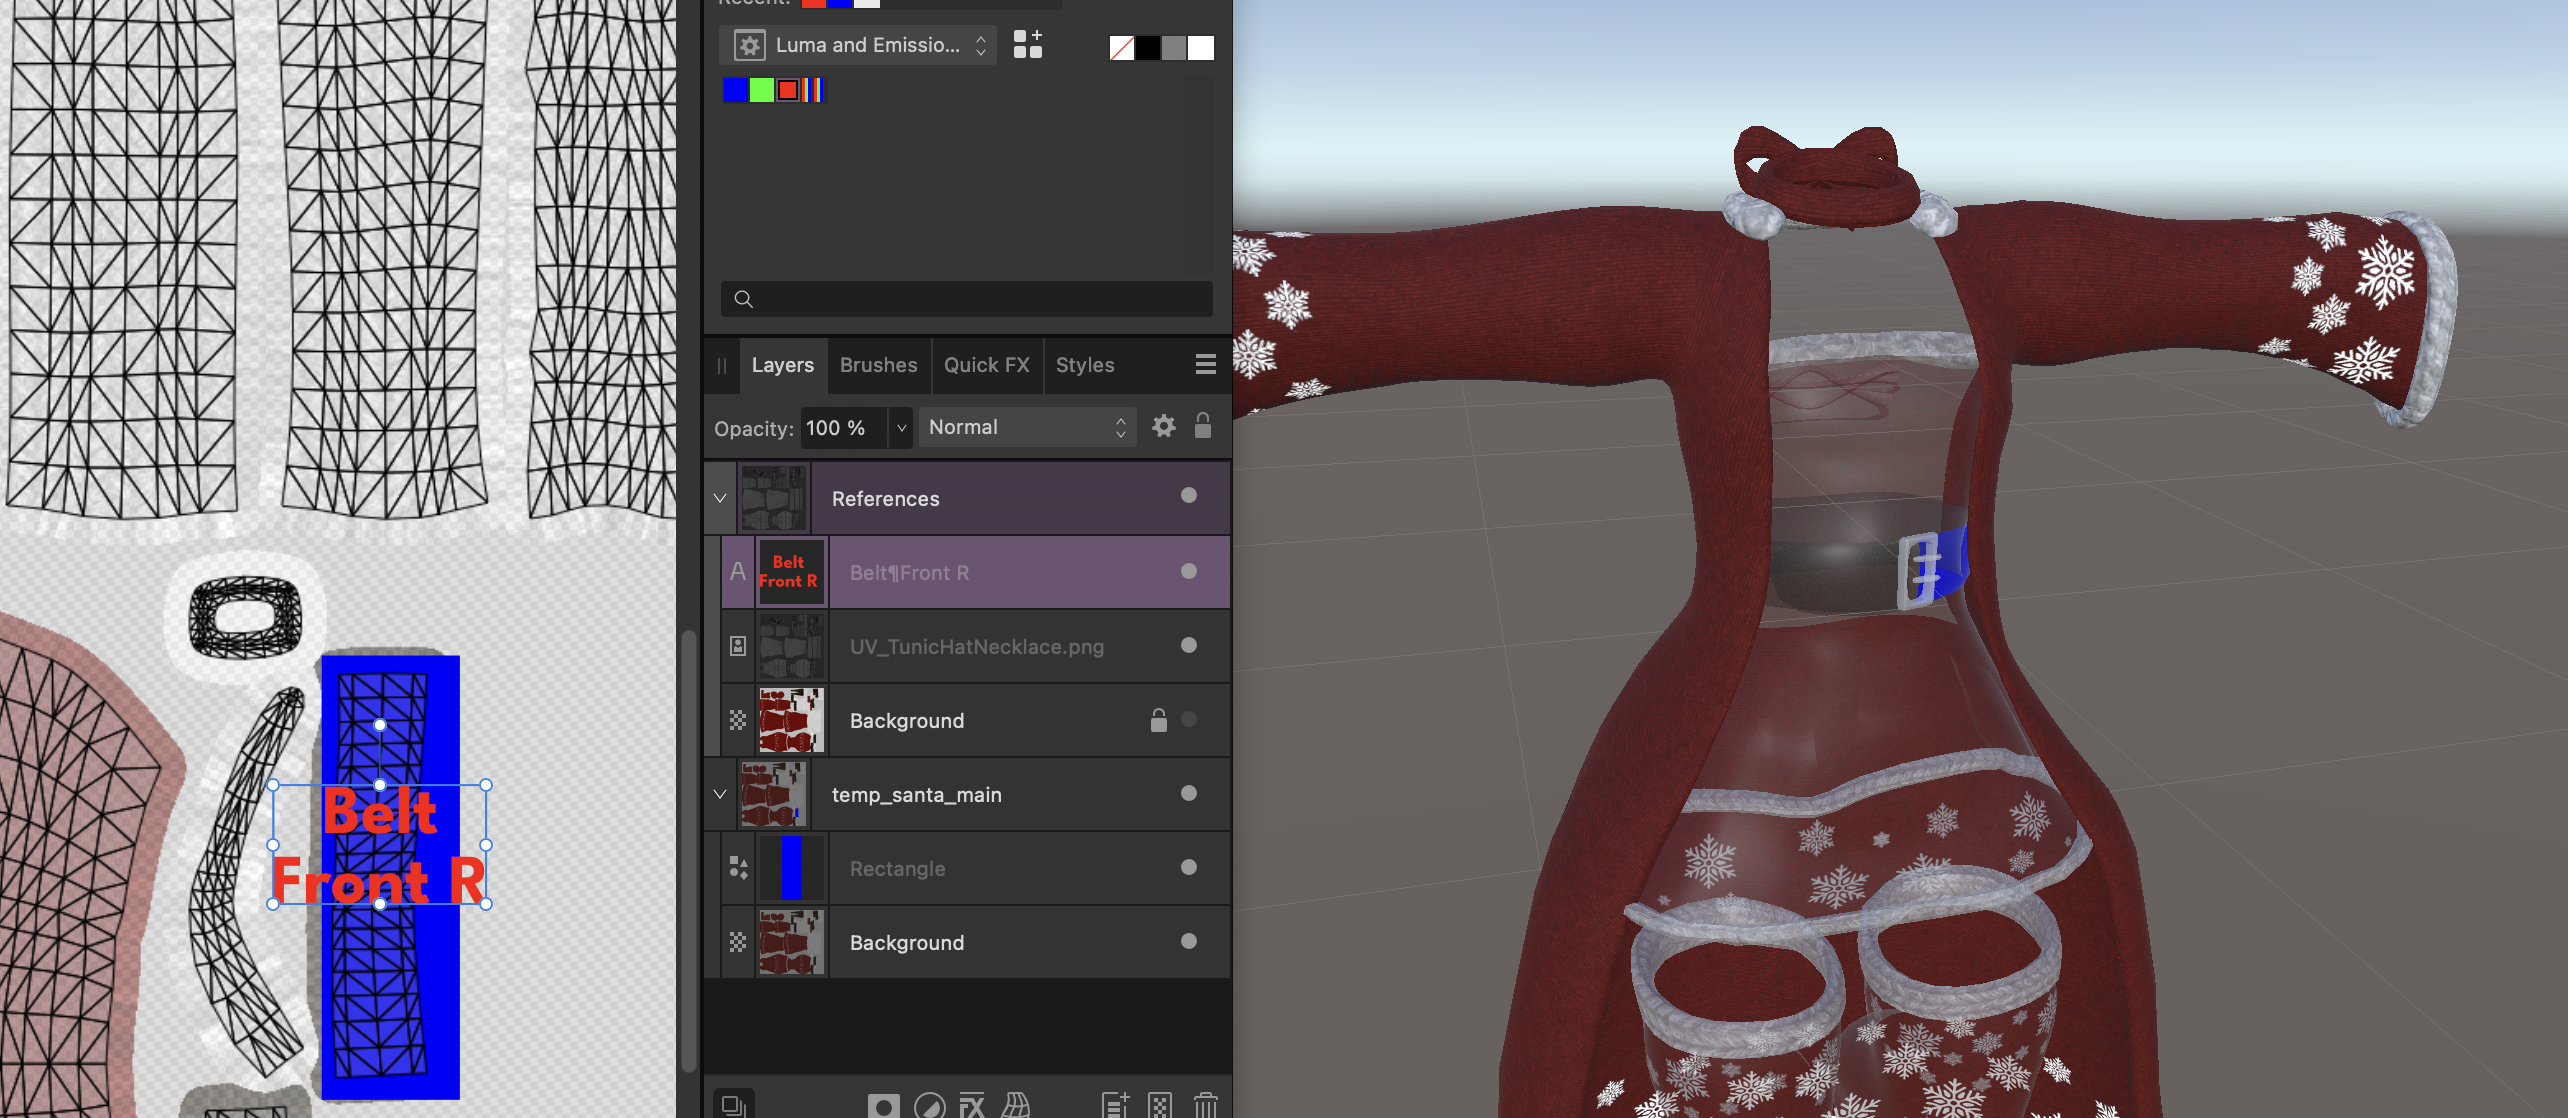
At this point, we import both the original texture and UV map we've just exported into Affinity Designer, saving them in a References group. This group never gets exported to Unity, it's just here to compare against.
We can then set up a temp texture and material in Unity, use this to discover where all the UV islands are, and annotate them.
blocked. blocked. all of you are blocked.
Next comes blocking out the avatar, getting a feel for the general shape of things without committing yet to additional detail or patterns.
In some circumstances, we might do this by recolouring an existing texture - normally to preserve shading detail - however, being for Furality specifically means that a layer of effects will be applied over what's done here, so flat colours are fine for now.

detailing and patterns
Affinity Designer provides a tool it calls Vector Flood Fill for easily applying a bitmap image to a shape.
Furality provide some tileable patterns.
Combine those two things and we can do a very quick first pass at this as well.
emissions and effects
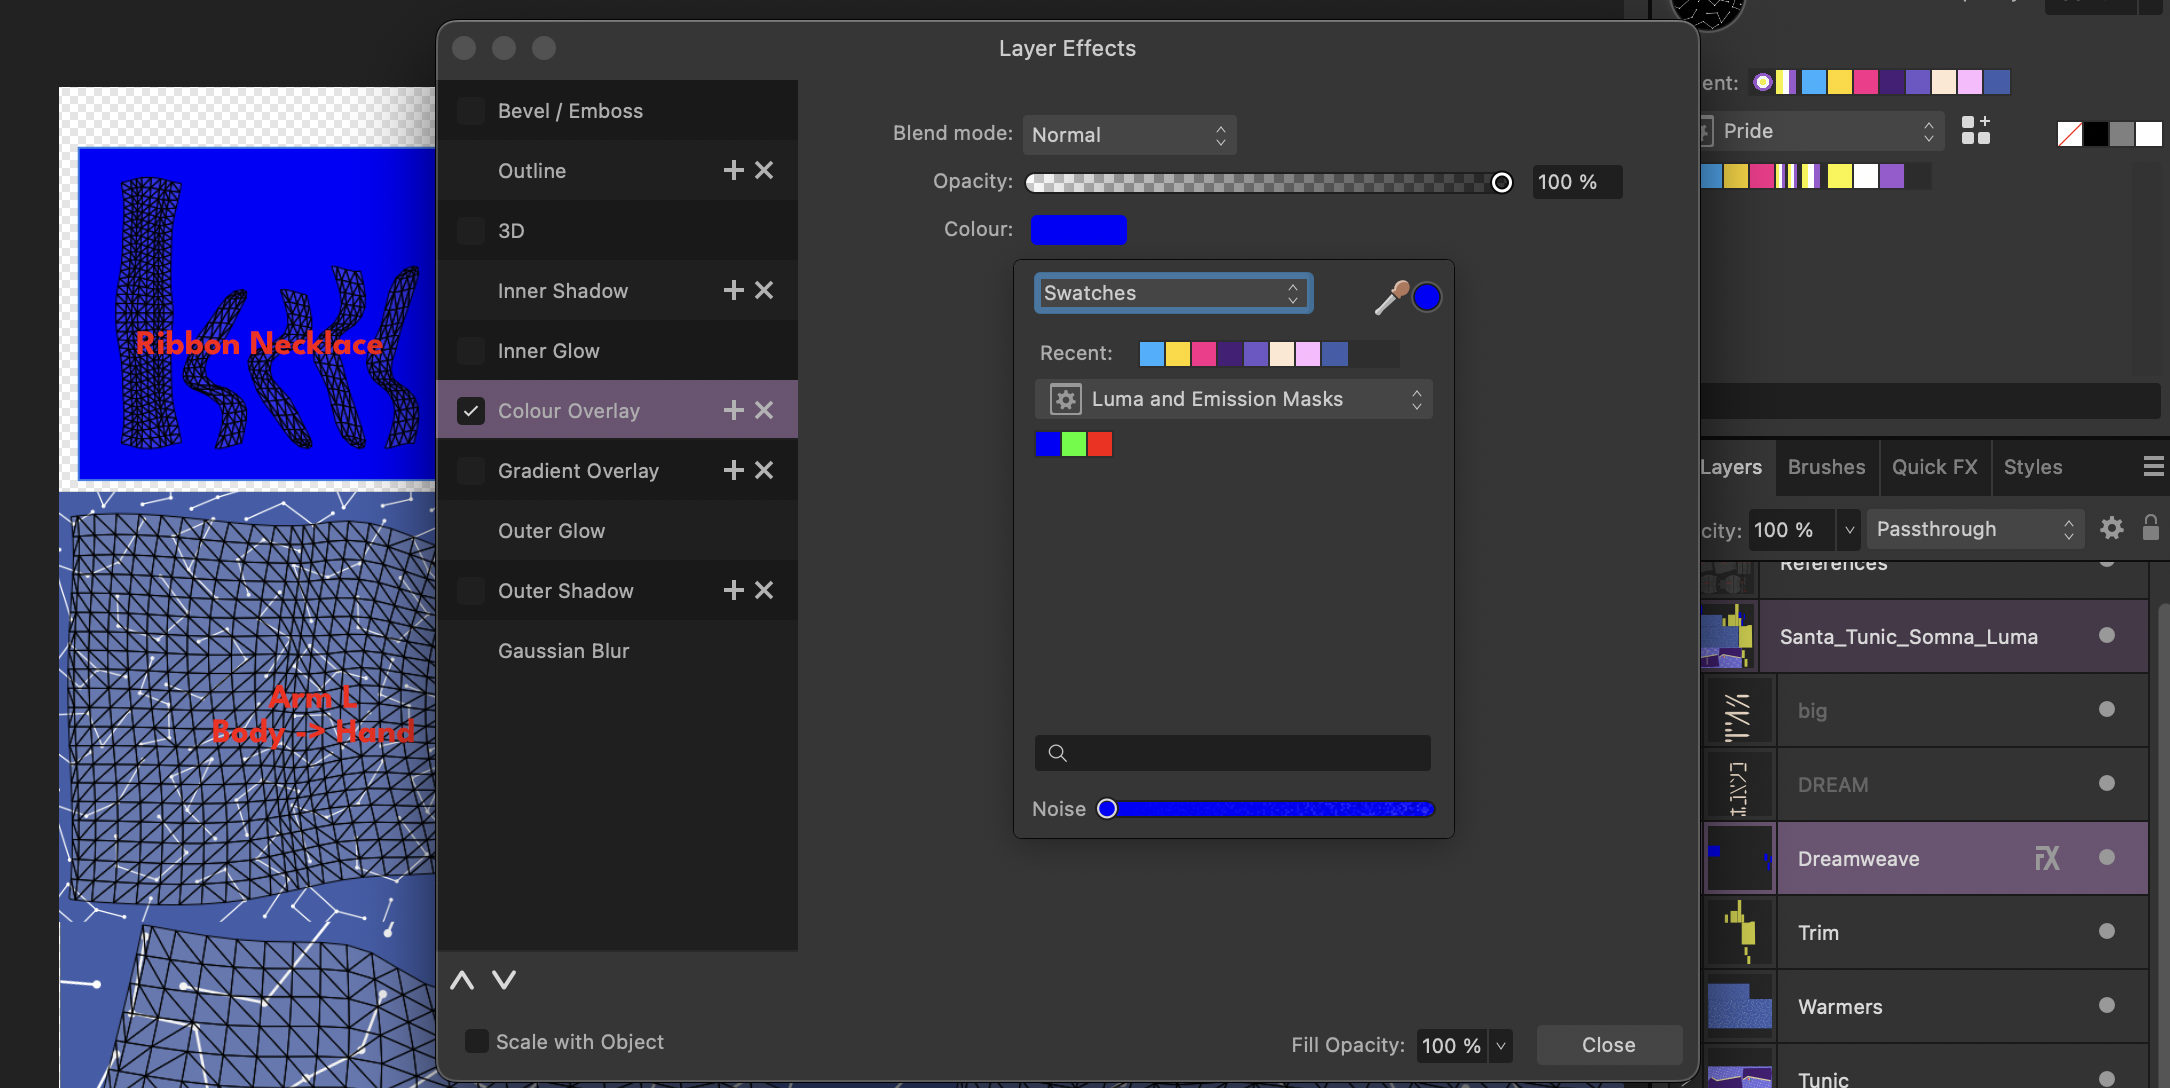
Now for the most important bit for the club - the emissions and effects mask(s).
By pressing Cmd+J on the main avatar group (Santa_Tunic_Somna in our case), we can Duplicate the entire group - and then change those colours to pure reds, greens, blues, or combinations of two of them to control which effects go where. Because of the way we've grouped some of the stuff on the base layer, we can do everything for that effect at once using the colour overlay feature.
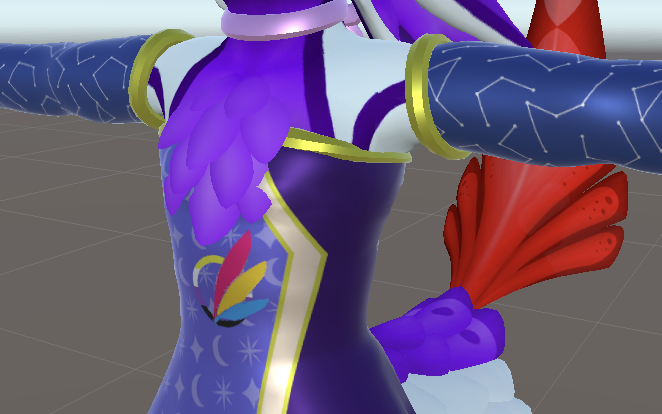
Some shader tweaks in Unity and we have a working demonstration.
This likely won't be the final version, but the process from here is just going back through these steps and refining.
Problems of this workflow
While we like this method, it does have some problems. A lot of things that would make the avatar look more realistic are harder with this method - adding shading (or maintaining the shading already present on the rendered texture), for example.
It also means that normal maps can't be used - but as a potentially lukewarm take, massive uncompressed normal maps are a big reason why so many avatars are a resource hog.
Where possible, detail normals should be used instead - providing some of the benefits of normal maps in terms of faking geometry and variation at a fraction of the size.
There's also a weakness when it comes to direction maps for the flow of emissions and other effects - having one effect flowing in a consistent direction throughout an avatar is a lot easier to set up with painting on the model.
final thoughts
The point of this article was not to show necessarily the best or fastest method - indeed, if you're getting started, Blender is probably the way to go in terms of versatility.
But when we were first getting to grips with things... well, we believed we couldn't express ourselves visually with anything more than shitty doodles.
And it has been such a relief proving ourselves wrong about that, to be able to explore and experiment. I can say with certainty that before we started doing this, we would not have looked at a Santa outfit and thought about how we could transform it. Maybe some can, but not us.
And so, even if there's some aspect of expressing yourself in 3D you're avoiding... we wish you the best of luck in doing what you can.
further resources
- A lot of our ambient knowledge about Blender comes from Kaideart's tutorials
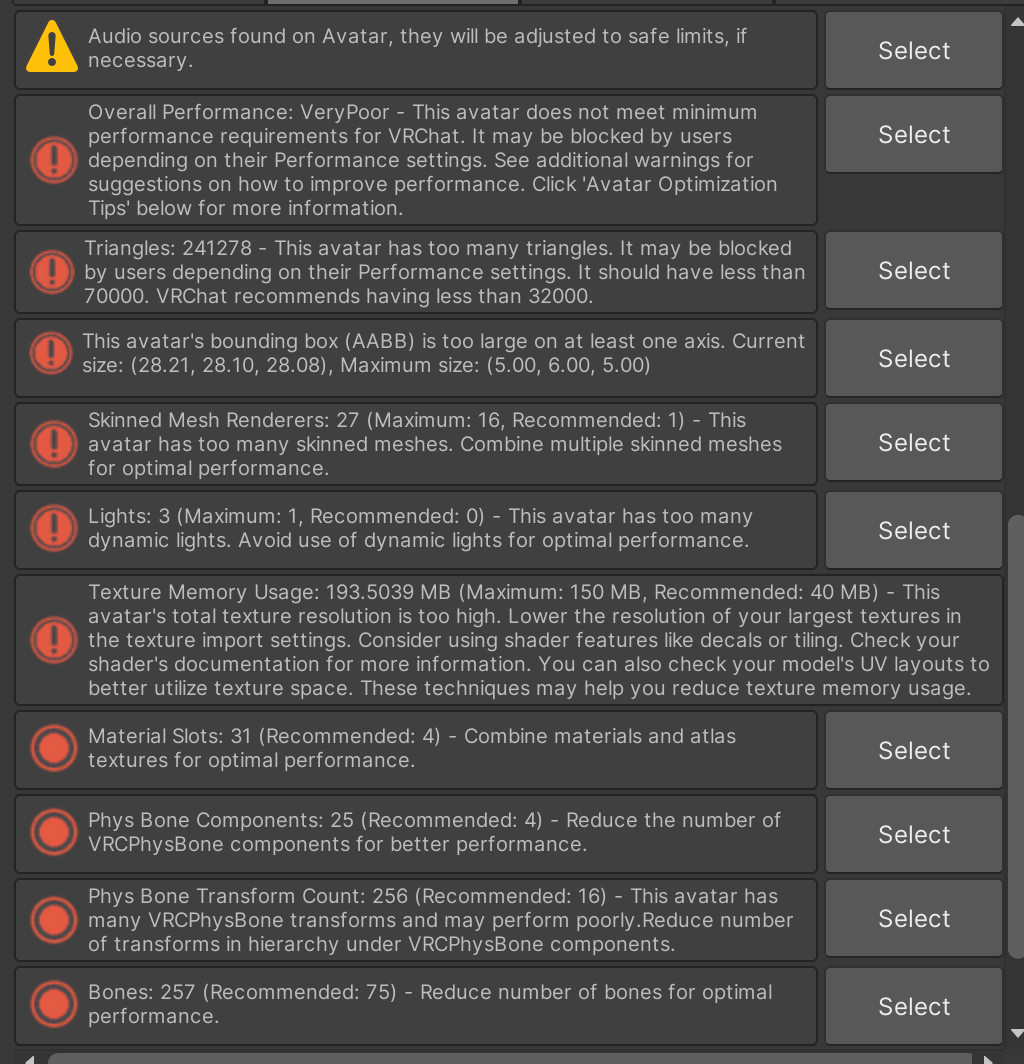
- Furality Umbra's optimization panel was a great resource on some of the things that can be done to optimize, even if we're definitely not at the level of adding multiple UV maps yet.
Footnotes
It is entirely possible we've missed a setting somewhere. ↩︎
Which they definitely, definitely got on Steam and nowhere else. ↩︎
Commonly in Photoshop's .PSD format which is almost a lingua franca as far as art apps go - but we've also seen the GNU Image Manipulation Program's .xcf, and Krita's .kra as well. ↩︎